Cet article vous a-t-il été utile ?
Comment pourrions-nous l'améliorer ?
Configuring Lyve Cloud as a SAML Service Provider
To configure Lyve Cloud as a SAML service provider:
- Obtain metadata from your IdP administrator.
- Configure Lyve Cloud as a service provider.
- Add service provider metadata to the identity provider.
- Configure the identity provider to send email attribute.
- Update the metadata file.
Obtain metadata and certificate from your IdP Administrator
Contact your organizations IdP administrator and obtain the metadata file in XML format to upload and configure Federated Login.
For more information on generating a metadata file for Okta, see Generating XML Metadata files for IdP.
Configure Lyve Cloud as a service provider
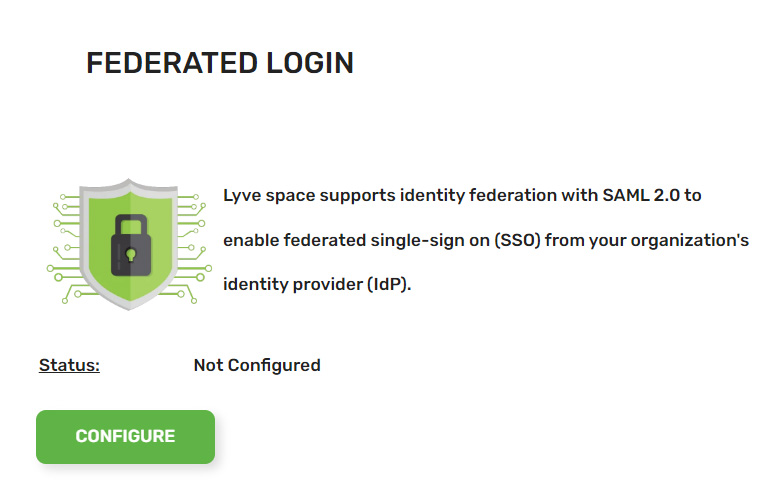
- Log in to the Lyve Console either as Root or an Admin user. From the top menu, select the Federated Login tab.

- On the Federated Login page, select Configure.
- Select Update Metadata file.

- Navigate to the location of the XML file and select it. Select Open.
- After the Metadata file is uploaded successfully, the configuration data is displayed with its status ('Configured'), the name of the identity provider, and the metadata file expiry date. Example:
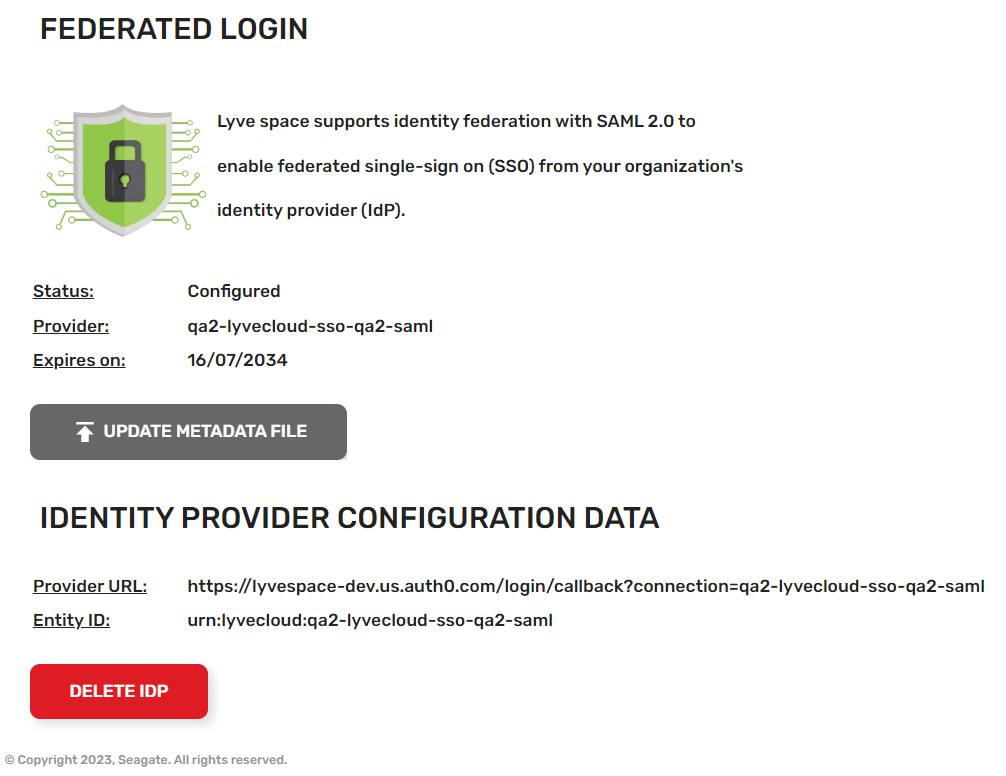
In addition, the identity provider configuration details are provided. The following attributes are used to configure the IdP:
- Provider URL
- Entity ID
Add service provider metadata to the identity provider
- Add some information to the IdP that allows it to receive and respond to SAML-based authentication requests from the Lyve Cloud service provider. The following instructions are generic. You will need to find the appropriate screens and fields on the identity provider.
- Locate the screens from the Identity Provider that allow you to configure SAML.
The IdP must know where to send the SAML assertions after it has authenticated a user. This is the Provider URL in Lyve Cloud. The IdP might call this Assertion Consumer Service URL or Application Callback URL.
https://authenticate.lyve.seagate.com/login/callback?connection=<RESELLER>-<TENANT>-saml
The connection URL parameter is required for identity provider-initiated flow.
https://authenticate.lyve.seagate.com/login/callback?connection=--saml
- Enter the entity ID in the Audience or Entity ID field from Lyve Cloud: urn:lyvecloud:<RESELLER>-<TENANT>-saml
- If IdP provides a choice for bindings, select HTTP-Redirect from the Authentication Requests dropdown.
- The Single Logout Service URL field contains the destination for SAML logout requests and/or responses from the identity provider. Enter https://LYVECLOUD_CONSOLE_URL/signout
Configure the identity provider to send email attribute
Lyve Cloud reads an “email” attribute from the identity profile. Some IdPs send “email” by default, while some require you to configure it to send “email”.
Okta
Okta must be configured to send an email attribute.
- Select Applications from the sidebar, and then select Applications.
- Select an application to edit, and then select General.
- Select Edit in 'SAML settings'.
- Leave the 'General Settings' as they are and select Next.
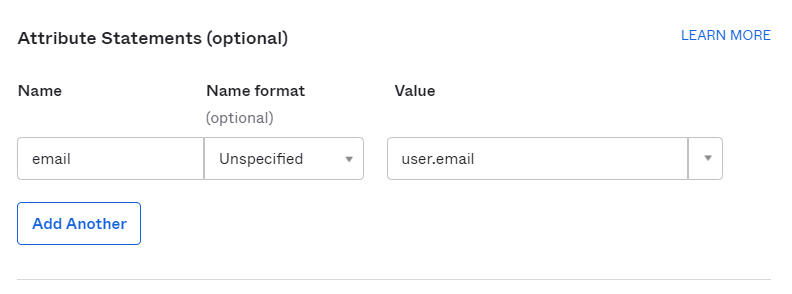
- In the 'Attribute Statements (optional)' section, select Add Another. Update the attributes as follows:
- Name = email
- Value = user.email
Update the metadata file
You will need to update the metadata file before the certificate expires. Contact your IdP administrator to get the updated XML file. If you make any updates and regenerate metadata.xml, you must delete the old metadata file before uploading the updated file. If you upload the file without first deleting the old file, it may not update the old file.
- From the top menu, select the Federated Login tab.
- On the Federated Login page, select Update Metadata file.
- Navigate to the location of the updated XML file. Select the file, and then select Open.
After the metadata file is uploaded successfully, the configuration data is displayed along with its status ('Configured'), the name of the identity provider, and the metadata file expiry date.
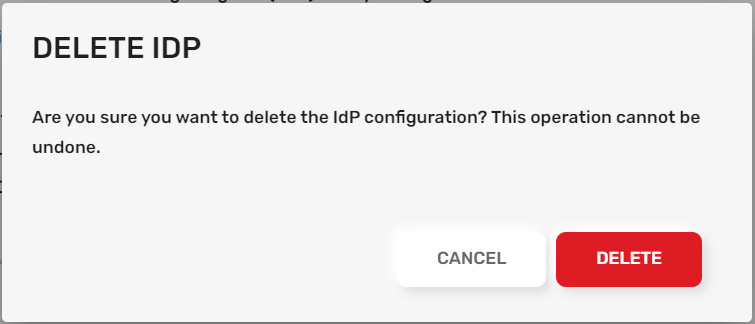
Delete an existing IdP configuration
To delete an IdP configuration:
- From the top menu, select the Federated Login tab.
- On the Federated Login page, select Delete IdP.

- In the Delete IdP dialog, select Delete.