These instructions apply to all of the applications that handle files, such as FamilyLibrary, MyLibrary and MyBackup. Changing a folder’s sharing state (who is allowed to view it) is managed the same way in each application. You can also make folders with media files available to a Digital Media Player (DMP) on your home network.
Sharing Folders
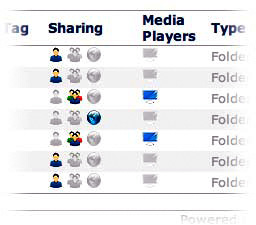
The Ethernet Disk mini makes it easy to share folders with people on the Internet. You can control what information you publish on the Internet using the Ethernet Disk mini sharing facilities. You can only share folders, not individual files; when a folder’s sharing state is set, all files within that folder acquire the same sharing state, so make sure you’re prepared to share everything within a shared folder. Folders have three sharing options:
- Private: Only you can see these folders, and then only when you are signed in to your Ethernet Disk mini. Any information which is not private is said to be “published”.
- Shared: Published only to people with whom you choose to share it. This is accomplished by creating a Sharing List.
- Public: Published for anyone on the Internet to see. Individual applications will display the public URL for these folders. A folder’s current sharing state is displayed under the Sharing column, as one of the above three icons. To change the folder’s sharing state, click on one of the two other (gray) icons in the Sharing column or select the folders you want to share and click the Share button in the action bar.

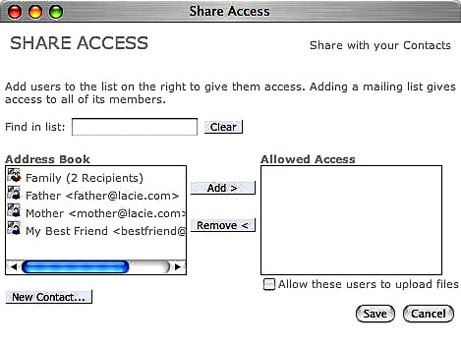
If you click on the Shared icon in the Sharing column (or the Share button in the action bar and then, Choose Users) the Share Access window will open.
- Add users or contact lists to the Allowed Access list by selecting them in the Address Book list and then clicking Add.
- Select the “Allow these users to upload files” check box to give users in the Allowed Access list the ability to upload files to the folder or folders you are sharing with them.
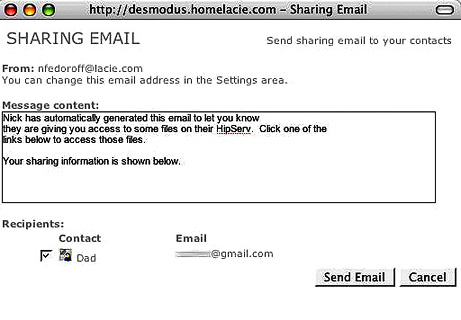
- When you click Save, the Sharing Email window will open with an automatically-generated email message with instructions for your friends about accessing your content.

Sending Sharing Invitation Email
Sharing invitation emails make it easy for your contacts to access the content you want to share with them. When you share a folder, as described above, an email message is automatically generated. Embedded in the message is a link to your content. All your friends have to do is click on the link for immediate access. To send a sharing invitation email:
- Follow the steps for sharing a folder above.
- A default message appears in the Message content area of the Sharing Email window. You can change this message if you want. The link to you content will be included in the message even if you delete all of the text.
- Select the recipients you want to send the message to.
- Click Send Email.


