Upgrading your PS5™ storage with an M.2 SSD is a game-changer, providing faster load times and more space for your favorite games. Whether you’re running out of room or just want to boost your console’s performance, this guide will walk you through the process of adding an M.2 SSD to your PS5. We'll cover everything you need, from choosing the right SSD to safely completing the installation. No need to worry—this straightforward upgrade is within reach, even if you're not a tech expert. Let’s get started!
Choose the Right SSD for Your PS5
Choosing the right M.2 SSD is crucial when upgrading yourPlayStation® 5 experience. Here are some things to considerwhen looking for an M.2 SSD for your PlayStation.
Compatibility
Your M.2 SSD needs to meet certain requirements to enhance your PS5 storage. The PS5 only supports NVMe SSDs designed for high-speed data transfer. Confirm your SSD is of the M.2 2230 or 2280 size because these dimensions fit perfectly within the console expansion slot.
Additionally, confirm the SSD meets Sony® compatibility standards, which include a PCIe Gen 4.0 interface. This is essential for achieving the high-performance levels gamers expect from their PS5.
Specifications
Be aware of the following key specifications when selecting an M.2 SSD for a PS5:
- Read/Write Speeds: Look for an M.2 SSD with a minimum sequential read speed of 5,500 MB/s. Higher speeds mean quicker load times, allowing you to dive into games without long waits.
- Capacity: PS5 allows SSD capacities of up to 4TB, giving you ample space to store your favorite games and media. Depending on your gaming habits, you can choose an SSD that fits your storage needs, such as 1TB for casual gamers or 2TB or more for those with extensive game libraries.
- Heatsink Requirement: An effective cooling solution is necessary to maintain optimal performance during intense gaming sessions. Most SSDs will require a heatsink to dissipate heat, so the system operates efficiently without thermal throttling.
Recommendation
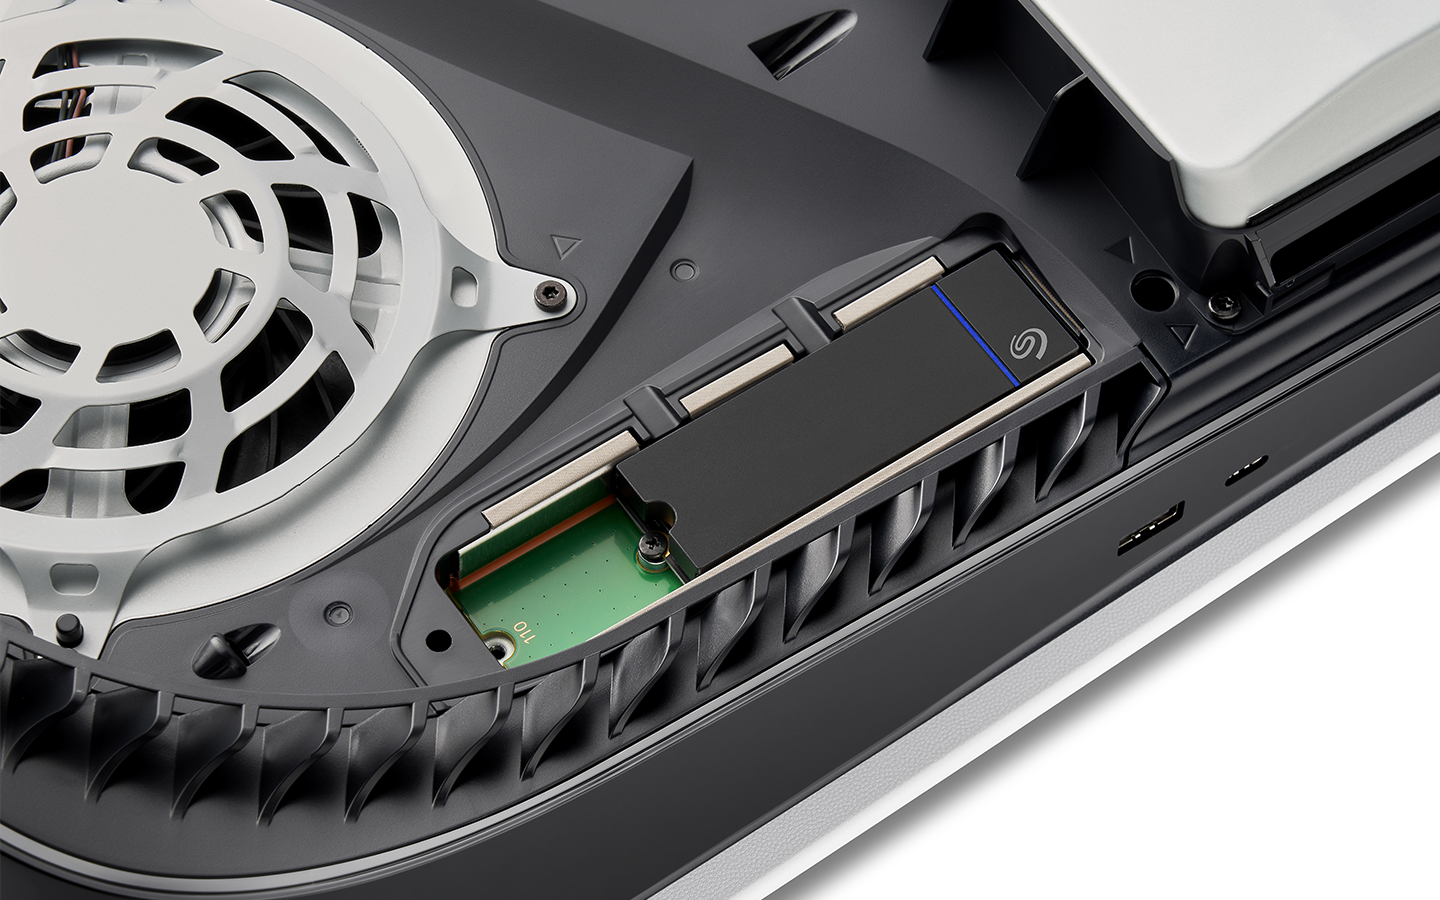
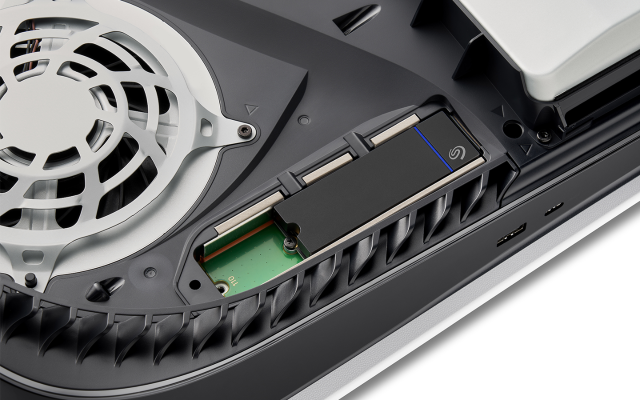
We recommend Seagate FireCuda® 530R with Heatsink SSD as a top choice for PS5 owners for an outstanding combination of performance, reliability, and advanced technology. This M.2 SSD is designed for gaming, featuring blazing-fast read speeds of up to 7,300 MB/s, which makes loading times nearly instantaneous.
With capacities ranging from 1TB to 4TB, the FireCuda 530R provides ample space for your growing game library. Also, its integrated heatsink helps maintain optimal temperature levels, supporting consistent performance during long gaming sessions. Elevate your gaming experience with the FireCuda 530R and enjoy the power of enhanced storage.
How to Prepare for the Installation of an M.2 SSD
It’s important to complete certain prep work that will lead to a successful and seamless upgrade when installing an internal SSD for PS5.
Here’s how to get ready:
Step 1: Back Up Your Data
Backing up your game saves and data is crucial before installing a new SSD. While installation is generally safe, unexpected issues can arise, potentially leading to data loss. To avoid losing your precious game progress and personal settings, take a few moments to back up your data.
If you have a PlayStation® Plus subscription, you can take advantage of the PS5 integrated cloud storage to safely back up your game saves online. Alternatively, consider transferring your data to an external USB drive for added convenience. This precaution guarantees you can restore your games and settings if anything goes wrong during the SSD installation process.
Step 2: Confirm You Have the Latest PS5 System Software
Keeping your PS5 system software updated is crucial to promote compatibility and maximize the performance of your new M.2 SSD. Follow these steps to check for and install any available updates:
- Navigate to Settings: From the PS5 home screen, go to the gear icon in the upper right corner to access the Settings menu.
- Select System Software: Scroll down and choose System Software.
- System Software Update and Settings: Click System Software Update and Settings.
- Check for Updates: Choose Update System Software to see if there are any available updates. If an update is available, follow the on-screen instructions to download and install it.
Keeping your system software updated helps your PS5 recognize your new SSD and allows you to take full advantage of its performance capabilities.
Step 3 (Optional): How to Remove an M.2 SSD from a PS5 Console
If you’re replacing an existing M.2 SSD, knowing how to remove it safely is important. Here’s a quick guide to help you through the process:
- Power Off and Unplug Your PS5: Always ensure the console is completely powered off and unplugged before attempting any hardware changes.
- Remove the PS5 Cover: Carefully take off the PS5 cover to access the M.2 expansion slot. Follow the specific instructions in your PS5 manual for safe removal.
- Locate the Existing SSD: Find the SSD that you want to remove.
- Unscrew the SSD: Use the appropriate screwdriver to remove the screw holding the SSD in place, and gently slide it out of the expansion slot.
- Store the SSD Safely: If you plan to keep the old SSD, store it in a safe place to avoid damage.
How to Install an M.2 SSD in Your PS5 Console?
Now that you’ve backed up your data, confirmed you have the latest PS5 system software, and removed the existing M.2 SSD, it’s time to install Seagate M.2 NVMe SSD into your PS5. Carefully follow these steps for a successful upgrade:
Step #1: Gather Your Tools and Prepare Your Workspace

Before you begin, organize the necessary tools. A small phillips head screwdriver will be necessary to reach the M.2 slot and fasten the SSD securely. It’s also advisable to have a clean, static-free workspace. Consider using an anti-static mat or wrist strap to prevent static electricity from damaging your console or SSD. Clear any clutter from your workspace to avoid losing small parts and be sure you have enough room to maneuver comfortably.
Step #2: Power Off and Unplug the PS5

Safety is paramount when working with electronic devices. Make sure your PS5 is powered off. Press and hold the power button until you hear a second beep, indicating it’s off. Disconnect all cables—including the power cable and HDMI—to ensure there’s no risk of electrical shock or damage during the installation process.
Step #3: Access the Expansion Slot

With your PS5 powered off and unplugged, access the M.2 expansion slot. Carefully remove the PS5 cover by following these steps:
- Place the console on a flat surface with the logo facing down.
- Gently slide the cover toward the console base, following the arrows marked on the casing.
- Lift the cover away from the console to expose the internal components, including the expansion slot.
Step #4: Insert the FireCuda 530R SSD

With access to the M.2 expansion slot, insert your FireCuda 530R SSD:
- Hold the SSD by the edges, avoiding contact with the gold connectors.
- Align the notches on the SSD with the grooves in the expansion slot.
- Insert the SSD at a slight angle (around 30 degrees) and gently push it down into the slot until it clicks into place.
Step #5: Secure the SSD with Screws

To secure the SSD so it remains in place during operation, fasten it with screws:
- Use the same phillips head screwdriver to tighten the screw(s) provided with your PS5 or SSD.
- Carefully screw it down until it’s snug, but don’t overtighten it because this could damage the SSD or console.
Step #6: Close the PS5 Cover

With the SSD securely in place, reattach the PS5 cover:
- Position the cover over the casing, making sure the clips are inserted into their appropriate slots.
- Gently slide the cover back into position, following the direction of the arrows, until it clicks into place.
Step #7: Power on Your PS5 and Initialize the SSD

Now that the installation is complete, you can power on your PS5:
- Reconnect all cables, including the power and HDMI cables.
- Press the power button to turn on your game console.
- Once booted up, navigate to the PS5 settings by selecting the gear icon on the home screen.
- Navigate to Storage and choose M.2 SSD. Follow the on-screen instructions to initialize your new SSD and format it for compatibility with your PS5.
Congratulations! You’ve successfully installed an M.2 SSD into your PS5, unlocking the potential for expanded storage and enhanced gaming experiences.
Check out this video tutorial for a visual walkthrough of the installation process.
Post-Installation Considerations and Steps
After successfully installing your M.2 SSD into your PS5, there are a few important post-installation steps to have your new storage ready for action.
Here’s what to do next:
Step 1: Format the SSD
You must format your newly installed SSD before you can begin using it. This process prepares the drive for use with your PS5. Here’s how to do it:
- Power up your PS5 and navigate to the home screen.
- Access Settings by clicking on the gear icon.
- Scroll down and select Storage.
- In the Storage menu, choose your M.2 SSD from the list of available storage devices.
- Follow the on-screen prompts to format the SSD. The PS5 will automatically format it to the correct file system to be ready for game storage.
Formatting may take a few moments, but once it’s complete, your SSD will be ready to use.
Step 2: Redownload and Reinstall Your Games and Apps
With your SSD formatted, you can now redownload your games and apps from your library. Here’s how to do this step:
- From the PS5 home screen, go to the Game Library.
- Select the Purchased tab to view your library of owned games and apps.
- Navigate through your library and choose the games you wish to install.
- Press the Download button for each game. By default, the PS5 will install them on your newly formatted SSD.
You can also install games directly from the PlayStation® store by selecting the game and pressing the Download button.
Step 3: Install and Move Games to the M.2 SSD Storage
If you have existing games on your PS5 internal storage that you want to transfer to your new M.2 SSD, follow these simple steps:
- Navigate to the Settings from the PS5 home screen.
- Select Storage and then choose Console Storage.
- Scroll down to Games and Apps. Here, you’ll see a list of installed games.
- Select the game you wish to transfer and press the Options button on your controller.
- From the menu that appears, choose Move to M.2 SSD.
- Confirm your choice, and the game will start transferring to your SSD.
You can repeat this process for any games you wish to move, freeing up space on your internal storage for additional downloads.
Step 4: Maintain the SSD
To help your SSD continue to perform optimally, consider these maintenance tips:
- Monitor Temperatures: Keep an eye on the SSD’s temperature during gameplay. The PS5 will manage temperatures, but if you notice heat, consider improving airflow around your console.
- Manage Storage: Regularly review your game library and remove any games or apps you no longer play. This will assist in optimizing storage space and ensuring performance is maintained.
- Update Firmware: Check for firmware updates for your SSD periodically and keep it up to date to enhance performance and stability.
These Seagate SSD post-installation and maintenance tips will help provide the best PS5 gaming experience.
Which M.2 SSDs Can Be Installed in a PS5
To match the speed and power of the PS5, compatibility starts with a PCIe Gen4 x4 M.2 NVMe SSD with a sequential read speed of 5500MB/s or faster. The PS5 M.2 expansion slot handles SSDs with a capacity range of 250GB up to 4TB. The most common compatible form factor size is 2280, but the PS5 M.2 expansion slot also takes sizes including 2230, 2243, 2260, and up to as high as 22110.
To maintain your M.2 SSD’s optimal speed, it must run at an optimal temperature. Operating at full speed, an M.2 SSD generates heat. When that heat gets high enough to damage the game drive, an M.2 SSD will activate thermal throttling to prevent damage. This will protect the drive and promote its longevity, but also slow down processing capabilities.
For this reason, PlayStation® recommends using a cooling structure to effectively manage SSD temperatures.
Where Are Complete M.2 SSD Compatibility Requirements?
Head to Sony® PlayStation® for a full breakdown of M.2 SSD requirements for upgrading your PS5.
Benefits of Upgrading Your PS5 with an M.2 SSD
Storage capacity and speed. It’s no secret that PS5 games are faster, better, and bigger, and a PCIe Gen4 x4 M.2 NVMe SSD increases your available storage space while maintaining the next-gen speeds you expect from PS5.
That means more games, more apps, and less time waiting. Easily move your games between the internal PS5 storage, a connected USB extended storage device, and an installed M.2 SSD storage.
FireCuda 530R with Heatsink Technology is Ready for Your PS5
Seagate FireCuda 530R with Heatsink is a high-speed PCIe Gen4 x4 M.2 NVMe SSD that PS5 users can install to upgrade the storage capacity of their PS5 console or PS5 Digital Edition console.
Equipped with a capacity of up to 4TB and sequential read speed of up to 7300MB/s, FireCuda 530R comes ready to play. Our heatsink—developed in partnership with EKWB—regulates temperatures so you won’t have to worry about thermal throttling in a game session.
Seagate FireCuda 530R with heatsink meets all requirements for upgrading your PS5. All you need to do is learn how to install a game drive into a PS5. With an M.2 SSD installed, your PS5 is ready to provide even more ultra-high-speed gaming.
Elevate Your PS5 Experience with Seagate FireCuda 530R M.2 SSD
Upgrading your PS5 with an M.2 SSD enhances your gaming experience and ensures you have the space and speed necessary to enjoy your favorite titles without limitations. We’ve explored how to choose the right SSD, the preparation steps for installation, and the detailed process of installing the Seagate FireCuda 530. You can find additional instructions in our Game Drive M.2 installation guide.
With its exceptional read/write speeds, compatibility with the PS5 and reliable performance, the FireCuda 530 is a premier choice for gamers looking to elevate their experience. By choosing the FireCuda 530, you’re investing in a storage solution that will significantly improve loading times and allow you to store more games and media than ever before. Say goodbye to the frustration of running out of storage and hello to seamless gaming with faster access to your library.
Explore Seagate FireCuda 530 to learn more about its capabilities and how it can enhance your gaming experience.
You should also consider the option of adding an external hard drive or SSD to your PS5 for a cost-effective, flexible way to expand storage without opening the console. This solution lets you store and play PS4 games directly from the external drive, while also backing up PS5 games to free up internal SSD space. Although PS5 games can't run from external drives, this option still provides easy access to a larger game library and media files. Explore Seagate external hard drives and SSDs for PS5.


