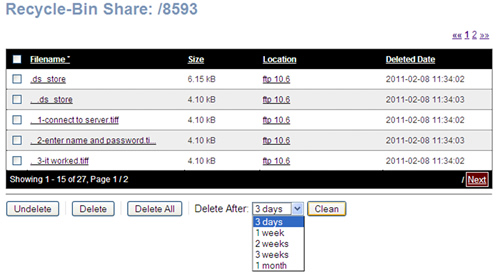
It is often assumed that when the Recycle Bin Service is enabled for the share, that means that the files have been deleted from a share. This is not exactly the case.
To illustrate, while you are currently logged into the BlackArmor Manager as Administrator:
- Go to Storage.
- Select the Recycle Bin Manager.
- Select a Share name on the left. Deleted files will be listed.

Using the Undelete Button
- Click a check mark in the field next to a file name and click the Undelete button.
- The file will be returned to the Share folder.
Using the Delete Button
- Click a check mark in the field next to the file name.
- Click the Delete button. The file will be removed from the Recycle Bin.
Using the Delete All Button
The Delete All button will remove all files from the Recycle Bin for that Share.
Using the Delete After and Clean Button option
The Delete After drop-down field displays the following choices:
- 3 days
- 1 week
- 2 weeks
- 3 weeks
- 1 month
Each deleted file has a Deleted Date listed. When choosing any of the above time frames, deleted files that fit within these time frames by Deleted Date will be deleted when clicking the Clean button.


