このコンテンツは役に立ちましたか?
どうすればこの記事をもっと役立つものにできると思いますか?
接続
ご使用のコンピュータで LaCie ハードディスク ドライブのボリュームが正しくマウントされるよう、以下の手順を必ず記載順に実行してください。
手順 1 - ポート カバーを取り外す
カバーの右端に人差し指を当てて、ゆっくりとカバーを引っ張って開き、取り外します。
手順 2 - お使いのコンピュータに接続する
LaCie Rugged Thunderbolt USB-C を接続する前に、コンピュータのポートを確認してください。LaCie デバイスには次のケーブルが同梱されています。
- Thunderbolt (デバイスに組み込まれています): お使いのコンピュータに Thunderbolt ポートまたはThunderbolt 2 ポートがある場合はこのケーブルを使用します。
- USB 3.1 Gen 2 (USB-C): お使いのコンピュータに USB-C ポートがある場合はこのケーブルを使用します。
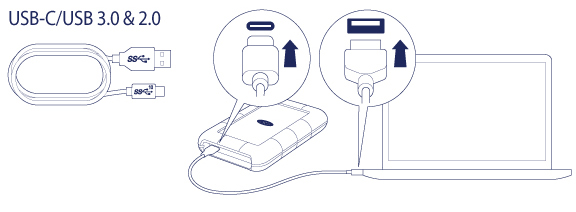
- USB 3.1 Gen 2 (USB-C)–to–USB 3.0/2.0 (タイプ A): お使いのコンピュータに Thunderbolt/Thunderbolt 2 ポートや USB-C ポートがない場合はこのケーブルを使用します。
Thunderbolt 接続
組み込みのケーブルを使用して、LaCie Rugged Thunderbolt USB-C をコンピュータの Thunderbolt ポートまたは Thunderbolt 2 ポートに接続します。

USB-C 接続
ケーブルを LaCie Rugged Thunderbolt USB-C の USB-C ポートと、コンピュータの USB-C ポートに接続します。

USB-C から USB 3.0/2.0 への接続
ケーブルを LaCie Rugged Thunderbolt USB-C の USB-C ポートと、コンピュータの USB 3.0/2.0 タイプ A ポートに接続します。

ステップ 3 - LaCie Setup Assistant
ドライブを使用する前に、必ず LaCie Setup Assistant ソフトウェアを起動してください。このソフトウェアでは次のことを実行できます。
- ユーザーのニーズに合わせてハードディスク ドライブを簡単にフォーマットします。
- お使いの LaCie デバイスを登録します。
- ユーザー マニュアルをハードディスク ドライブへコピーします。
- 追加機能を提供するソフトウェアをインストールします。
LaCie Setup Assistant の起動 - Mac
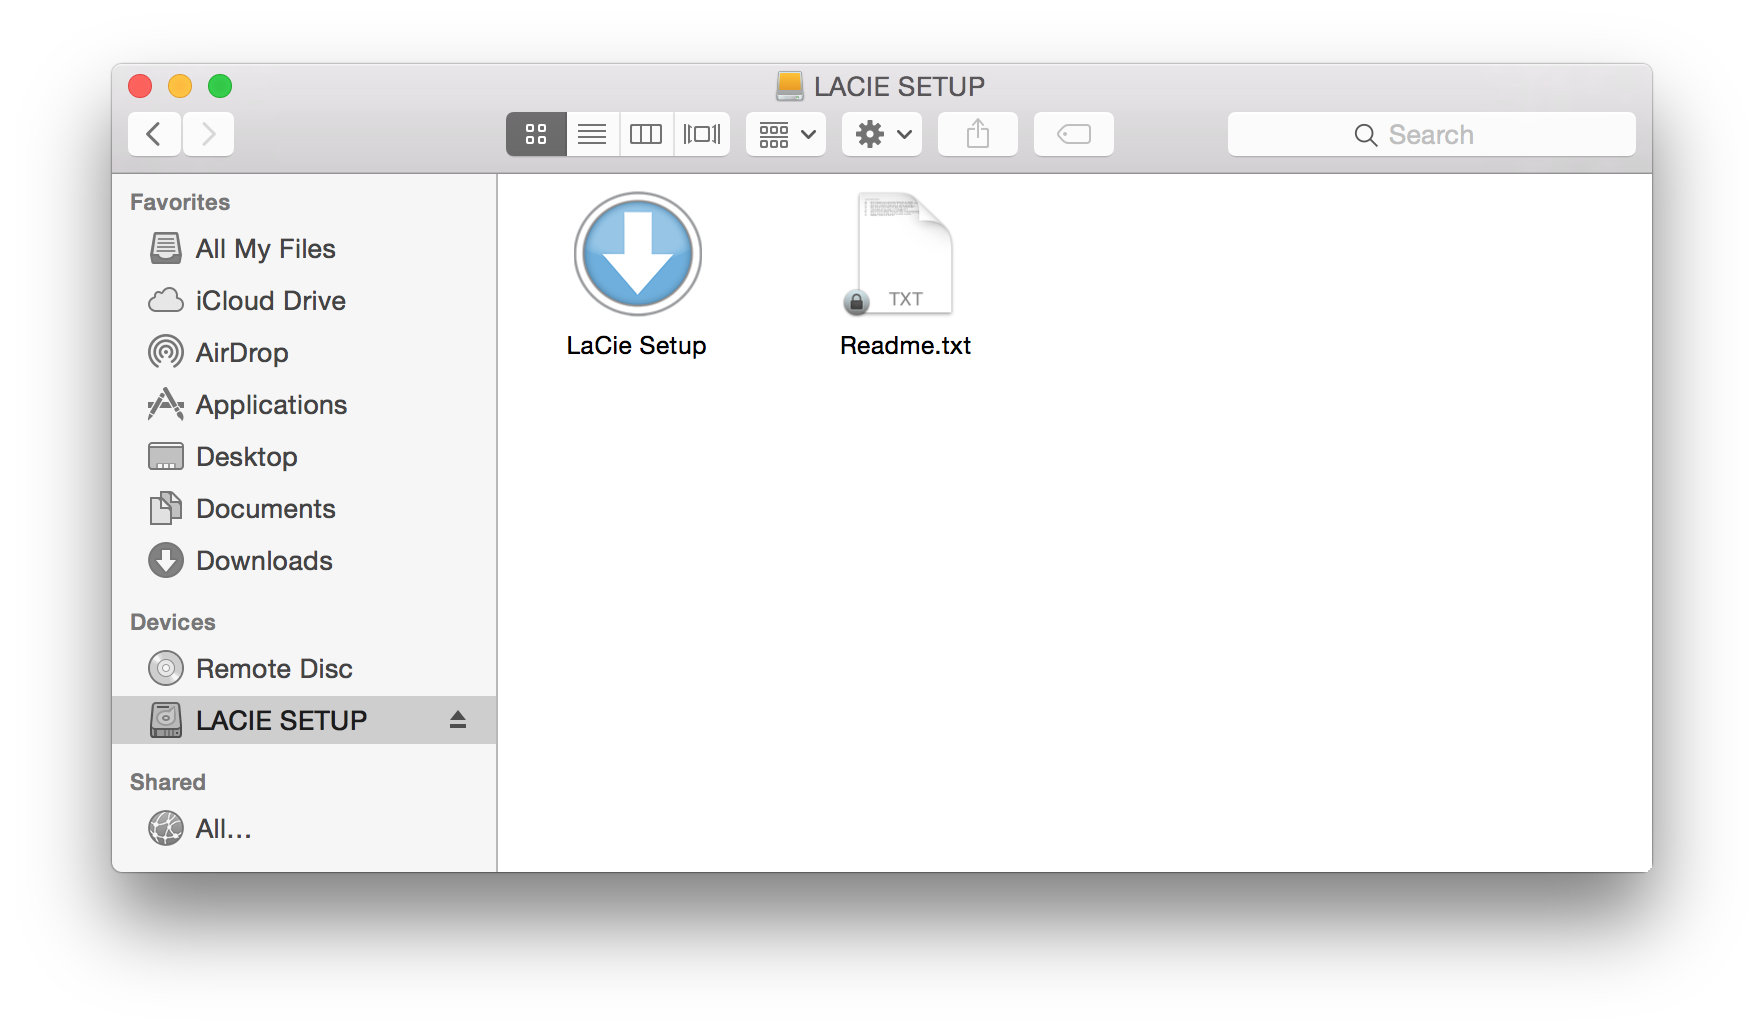
Finder で LACIE SETUP ボリュームを探して開き、LaCie セットアップ をダブルクリックします。

LaCie Setup Assistant の起動 - Windows
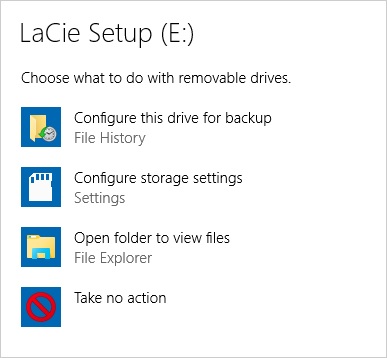
自動再生: LaCie のハードドライブをコンピュータに接続するとすぐに、Windows 自動再生により検出される場合があります。自動再生ウィンドウが表示されたら、[フォルダを開く] を選択してファイルを表示し、[LaCie セットアップ] をダブルクリックします。

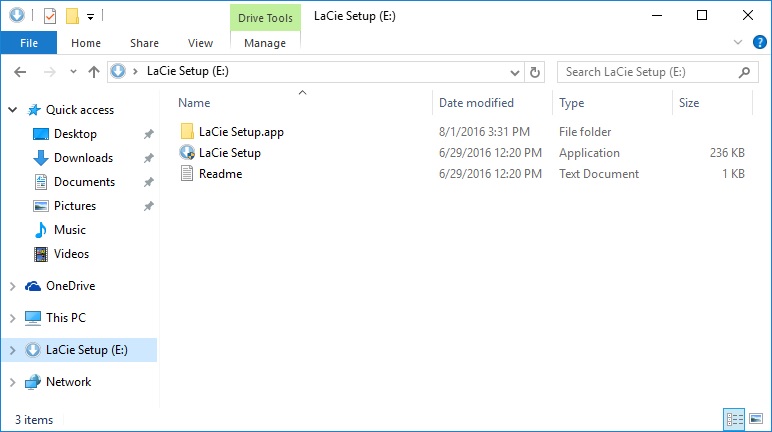
手動アクセス: [コンピュータ]/[この PC] の [LACIE SETUP] ボリュームを開き、[LaCie セットアップ] をダブルクリックします。

LaCie Setup Assistant の手順
LaCie Setup Assistant では、ハードディスク ドライブのフォーマットと登録や、LaCie ソフトウェア ユーティリティのインストールができます。画面の指示に従って設定を完了します。
または、お使いのシステムに付属のディスク ユーティリティ プログラムを使用して LaCie ドライブのフォーマットやパーティションを行うこともできます。詳細は、フォーマットおよびパーティション (オプション) を参照してください。
最初のインストール以降、ソフトウェア ユーティリティをインストールするには、LaCie Setup Assistant を再度実行してください。フォーマットは完了しているため、ソフトウェア ユーティリティの選択を指示するプロンプトのみが表示されます。LaCie Setup Assistant は以下で利用することができます。
- LaCie Share: 2つのパーティションを作成した場合
- LaCie: 1 つのパーティションを作成した場合
ディスク ユーティリティでドライブをフォーマットして、ソフトウェア ユーティリティまたはユーザー マニュアルにアクセスする必要がある場合は、LaCie カスタマー サポートを参照してください。