When you connect your FreeAgent Theater to your television for the first time you will notice that your photos and home movies don’t look as good as they should. This is because the Theater unit ships at a high compatibility setting which is defaulted to the lowest resolution SDInterlace (NTSC 480i or PAL576i). This allows the Theater AV dock to display on just about any television equipped with composite (Yellow, Red, White) RCA connections.
To view your Theater at the highest possible resolution you must connect a set of Red, Green and Blue RCA component cables and reset the resolution from SDInterlace to 1080i.
Note: Once you switch from SDInterlace (NTSC or PAL) to 1080i your television screen will go black. This condition is normal because the yellow RCA and the S-VIDEO adapter don’t support resolutions above 480p and 576p.
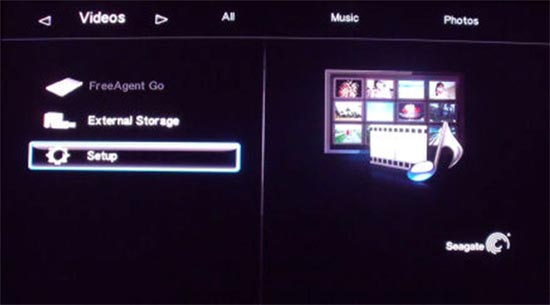
1. From the Theater main menu select Setup.

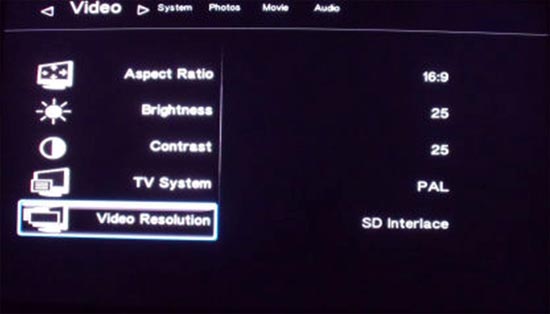
2. Switch to Video from the menu bar, then arrow down to Video Resolution.

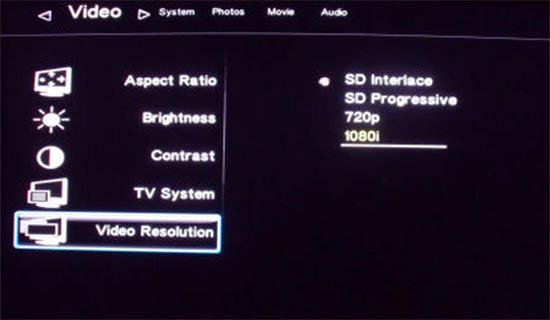
3.Press the Select button on the remote to view the resolution settings.

4. Arrow down to 1080i and press the Select button on the remote.
If your television screen went black after switching the resolution from 480i to 1080i then you need to connect the Red, Blue, Green RCA component cables to the Theater and your television.
Once the component cables are connected you need to switch your television's video input setting to match the corresponding video input connectors your Theater is connected to.
Not all HD TV’s autodetect the HDMI signal coming from the Theater after switching the resolution, so you will also need to check that your TV’s resolution is set to 1080i or HDMI for the input your theater is connected.


