Was this content helpful?
How could we make this article more helpful?
Security Management
With Lyve Token Security, members entrusted with security management provide product end users with unlockers (Lyve Token files) that allow access to specific Lyve Mobile Arrays in the subscription. Unlockers can authorize device access without a connection to Lyve Management Portal or the internet.
There are two types of unlockers:
| Software unlockers | A software unlocker is a client computer installed with the Lyve Client app. The software unlocker authorizes that instance of Lyve Client to access specific Lyve Mobile Arrays in the subscription. |
| Hardware unlockers | A hardware unlocker authorizes a device (a Lyve Mobile Padlock or Lyve Mobile Link) to unlock specific Lyve Mobile Arrays in the subscription. |
For more information on Lyve Token files and accessing devices with software and hardware unlockers, see the Lyve Mobile Security User Guide.
Create a Lyve Token file for a software unlocker
Prerequisites
The following items are required:
| Lyve Mobile Array(s) | Lyve Token files unlock specific Lyve Mobile Arrays in your subscription. At least one Lyve Mobile Array must have been added to your subscription. |
| Permissions | The member creating the Lyve Token file must have been granted the Manage Security permission (see Manage subscription members). Members lacking the Manage Security permissions will not see the Security menu in the sidebar. |
| Registration file | The product end user (the person who will be using the Lyve Token file to access devices) must provide you with a registration file (.JSON) for the unlocking app accessing the device. There are two software applications that can act as the unlocking app: Lyve Client (macOS/Windows) and Lyve Mobile Array CLI (Linux/Windows). The registration file must be created using one of the apps on the specific host computer that will access the Lyve Mobile Array(s). For an overview of the process as well as instructions on creating a registration file, see Accessing Devices with a Lyve Token Software Unlocker in the Lyve Mobile Security User Guide. |
Register the Lyve Client instance as a software unlocker
To register the Lyve Client instance:
- On the Home page, select Subscriptions in the sidebar.

- Select the appropriate subscription from the list.
- Select Security in the sidebar.

- Select Software Unlockers.
- Select the + Software Unlocker button above the list.

- Under 'Upload Registration File', select Click to upload a file.

- Navigate to the location of the registration file (.JSON) provided by the product end user. Select the file, and then select Open.
- Enter a name for the software unlocker. Choose any friendly name that helps you differentiate one product end user/Lyve Client installation from another.
- Select Register.
Wait a moment while Lyve Management Portal processes the file. The new unlocker appears in the list of software unlockers.
Create the token file
To create the token file:
- On the Home page, select Subscriptions in the sidebar.
- Select the appropriate subscription from the list.
- Select Security in the sidebar.
- Select Tokens.
- Select the + Create Token button above the list.

- Under 'Unlockers', select the software unlocker you registered previously.
- (Optional) Select the Save File switch if you want to allow the product end user to import the token file into the Lyve Client or Lyve Mobile Array CLI app.
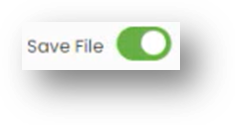
| Enabled | The Lyve Token file can be imported and stored in Lyve Client, allowing the host computer to unlock assigned devices whenever they’re connected. |
| Disabled | The Lyve Token file may only be used to unlock assigned drives for the current session. The file is not deleted from its location on the host computer, but it must be reselected each time the end user wants to use it. |
- Under 'Lyve Mobile Array(s)', select the storage device(s) this token file is authorized to access. If necessary, use the search field to filter the Lyve Mobile Arrays displayed in the list by the device serial number.
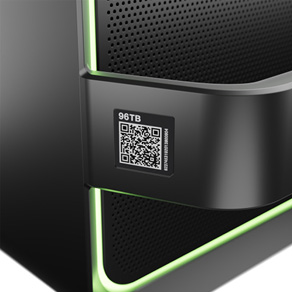
Do not confuse the QR code on the handle with the QR code on the back of Lyve Mobile Array, which is clearly marked PSID. The PSID is not the same as the serial number.
If the serial number on the handle is unreadable or doesn't work, use the Lyve Virtual Assistant icon to start a support session.
- Select Create.
Lyve Management Portal creates the token file and downloads it to the location where you receive downloads.
Send the token file to the product end user
Once the token file has been created, send it to the product end user with the computer that will unlock the connected Lyve Mobile Arrays assigned to it.
The end user will then import the token file and/or unlock Lyve Mobile Arrays with it. See End user final tasks in the Lyve Mobile Security User Guide.
Edit a software unlocker
You can edit a software unlocker in order to rename it.
- On the Software Unlocker Management page, select the More icon in the 'Actions' column next to the software unlocker you want to rename, and then select Edit.
- Edit the name.
- Select Save.
Remove a software unlocker
To remove a software unlocker:
- On the Software Unlocker Management page, select the More icon in the 'Actions' column next to the software unlocker you want to remove, and then select Remove.
- In the dialog, select Remove to confirm.
Create a Lyve Token file for a hardware unlocker
Prerequisites
The following items are required:
| Lyve Mobile Array(s) | Lyve Token files unlock specific Lyve Mobile Arrays in your subscription. At least one Lyve Mobile Array must have been added to your subscription. |
| Unlocking device(s) | A hardware unlocker authorizes Lyve Mobile Padlock or Lyve Mobile Link to unlock specific Lyve Mobile Arrays in the subscription. At least one unlocking device must have been added to your subscription. |
| Permissions | The member creating the Lyve Token file must have been granted the Manage Security permission (see Manage subscription members). Members lacking the Manage Security permissions will not see the Security menu in the sidebar. |
Create the token file
To create the token file:
- On the Home page, select Subscriptions in the sidebar.
- Select the appropriate subscription from the list.
- Select Security in the sidebar.
- Select + Token above the Lyve Token File(s) list.
- Under 'Unlockers', select a Lyve Mobile Padlock or Lyve Mobile Link in your subscription.
- Under 'Lyve Mobile Array(s)', select the storage device(s) this token file is authorized to access. If necessary, use the search field to filter the Lyve Mobile Arrays displayed in the list by the device serial number.
Do not confuse the QR code on the handle with the QR code on the back of Lyve Mobile Array, which is clearly marked PSID. The PSID is not the same as the serial number.
If the serial number on the handle is unreadable or doesn't work, use the Lyve Virtual Assistant icon to start a support session.
- Select Create.
Lyve Management Portal creates the token file and downloads it to the location where you receive downloads.
Send the token file to the product end user
Once the token file has been created, send it to the product end user with the unlocking device (Lyve Mobile Padlock or Lyve Mobile Link) that will unlock connected Lyve Mobile Arrays assigned to it.
The end user will then make the token file available to the unlocking device. See End user tasks in the Lyve Mobile Security User Guide.
Enable/disable access tokens
In Lyve Management Portal, can control whether access tokens are available for devices in your subscription.
To enable/disable access tokens for a subscription:
- On the Home page, select Subscriptions in the sidebar.
- Select the appropriate Lyve Mobile subscription from the list.
- Select Subscription Settings in the side bar.
- Select Security Settings.

To enable access tokens for the Org, go to Org Settings | Mobile Data Transfer Settings | Mobile Data Transfer Security Settings.
- Use the toggle to enable or disable access tokens for the subscription.

Specify subscriptions for cross-subscription access
Cross-subscription access allows a single access token to unlock Lyve Mobile devices across multiple Lyve Mobile subscriptions within the same Org.
To specify subscriptions for cross-subscription access:
- On the Home page, select Subscriptions in the sidebar.
- Select the appropriate Lyve Mobile subscription from the list.
- Select Subscription Settings in the side bar.
- Select Security Settings.
- Select the button and choose the subscription(s) to add. Only subscriptions belonging to the same Org will appear in the list and be available for selection.